

If you’re anything like me, you probably have a soft spot for Reese’s peanut butter cups. But what if I told you that we could take that concept and elevate it with a luscious strawberry cheesecake filling? Yep, you heard that right—Strawberry Cheesecake Reese’s is about to become your new favorite homemade treat!
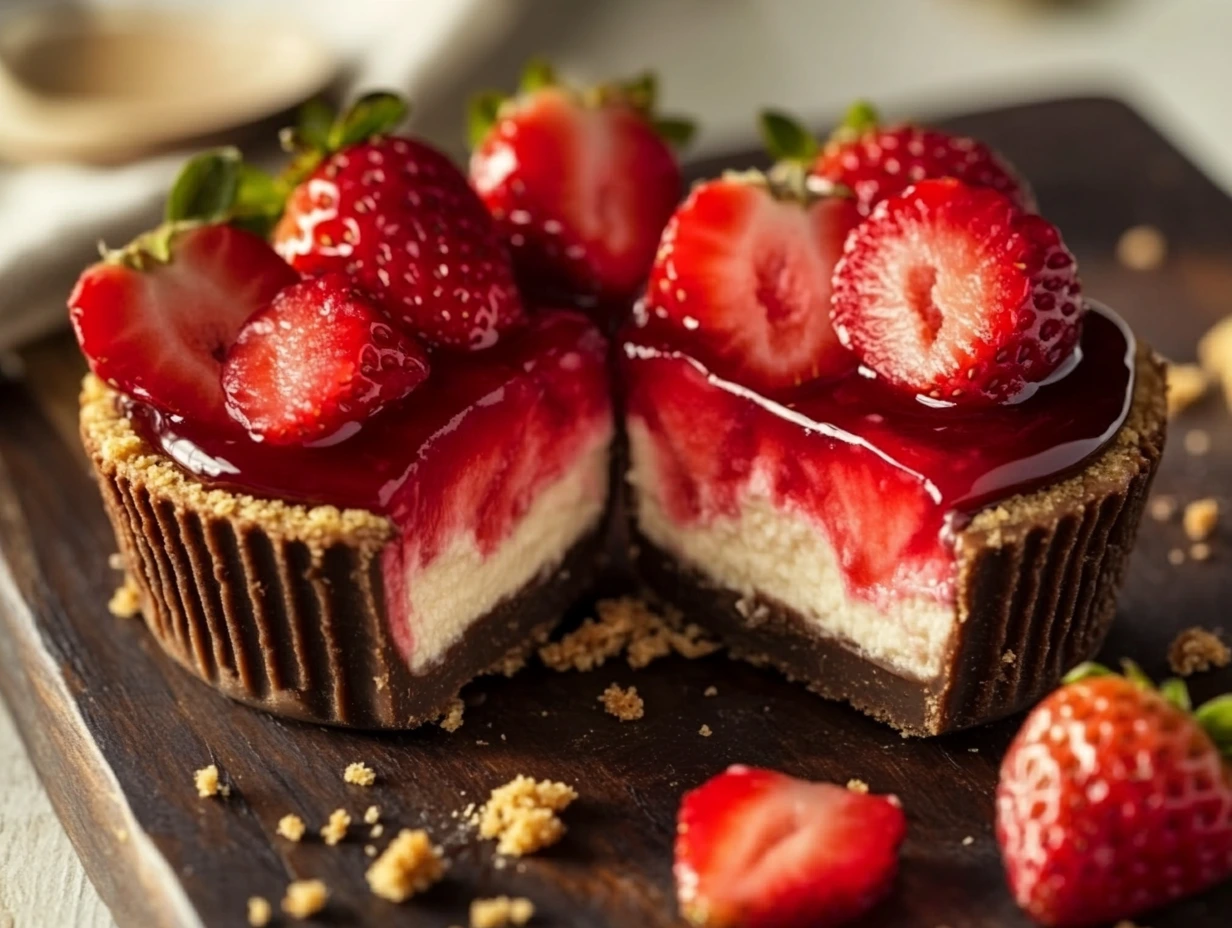
This recipe combines the rich flavors of creamy cheesecake, sweet strawberry sauce, and a crunchy graham cracker crust—all wrapped in a smooth chocolate shell. It’s like a decadent cheesecake bite meets your favorite candy, and trust me, they’re dangerously addictive.
So, whether you’re making these for a party, a weekend treat, or just because (no judgment here!), you’ll love how easy and fun these are to put together.
Let’s get started!
The Magic Begins: Prepping the Crust and Cheesecake Filling
Before we get to the fun part (aka chocolate-dipped deliciousness), we need to create the graham cracker crust and the cheesecake filling. These two components give the treat its classic cheesecake flavor with a perfect balance of crunch and creaminess.
Step 1: Prepare the Graham Cracker Crust
The crust is super simple to make, and it adds a great contrast to the creamy filling.
You’ll Need:
- 1 cup graham cracker crumbs
- ¼ cup melted butter
- 2 tablespoons granulated sugar
Instructions:
- Mix it up – In a small bowl, combine the graham cracker crumbs, melted butter, and sugar.
- Stir thoroughly – Mix until the crumbs are evenly coated and the texture is similar to wet sand. This ensures your crust holds together instead of crumbling apart.
- Set aside – No baking required! Just keep it aside while we move on to the filling.
Pro Tip: If you love a more pronounced crust, you can toast the graham cracker crumbs in a dry pan for 2-3 minutes before mixing. This gives them a slightly nuttier, deeper flavor.
Step 2: Make the Cheesecake Filling
Now, for the creamy, dreamy cheesecake layer! This part is rich but not too sweet, making it the perfect complement to the chocolate shell and strawberry sauce.
You’ll Need:
- 8 ounces cream cheese, softened
- ¼ cup granulated sugar
- 1 teaspoon vanilla extract
- 1 tablespoon lemon juice (optional, but adds a great tangy contrast!)
Instructions:
- Beat the cream cheese – In a mixing bowl, use an electric mixer (or some good old-fashioned elbow grease) to beat the softened cream cheese until smooth.
- Add sugar and flavorings – Mix in the sugar, vanilla extract, and lemon juice. Continue beating until the mixture is creamy and well combined.
- Set aside – Once smooth, set the filling aside while we prepare the strawberry sauce.
Pro Tip: If you want a fluffier cheesecake texture, beat the filling for an extra minute to incorporate a little air.
Strawberry Sauce: The Sweet, Fruity Center
This strawberry sauce adds a juicy, fruity contrast to the rich cheesecake filling and chocolate shell. It’s easy to make and can even be used on pancakes, waffles, or ice cream!
You’ll Need:
- 1 cup fresh strawberries, hulled and chopped
- 2 tablespoons granulated sugar
- 1 teaspoon lemon juice
Instructions:
- Cook the strawberries – In a small saucepan, combine the chopped strawberries, sugar, and lemon juice.
- Simmer and stir – Cook over medium heat, stirring occasionally, until the mixture starts to break down and thicken (about 5-7 minutes).
- Cool it down – Remove from heat and let it cool completely before using. This prevents it from melting the cheesecake filling.
Pro Tip: Want a smoother sauce? Mash the strawberries with a fork while cooking, or blend them once they’ve cooled.
Step 4: Creating the Chocolate Shells
The key to a perfect chocolate shell is using melted chocolate and ensuring it sets properly in your molds. You can use a microwave or a double boiler to melt the chocolate, depending on your preference.
You’ll Need:
- 2 cups melted chocolate (milk or dark – your choice!)
Instructions:
- Melt the chocolate – If using a microwave, heat the chocolate in 30-second increments, stirring between each session until smooth. If using a double boiler, melt the chocolate over low heat, stirring constantly.
- Coat the molds – Use silicone cupcake molds or a Reese’s-style mold. Spoon a bit of melted chocolate into each mold and spread it around using the back of the spoon or a small pastry brush to fully coat the sides.
- Set the first layer – Place the coated molds in the refrigerator for about 10 minutes to allow the chocolate to harden before adding the fillings.
Pro Tip: Want extra crunchy chocolate? Add a small sprinkle of crushed graham crackers or freeze-dried strawberries into the chocolate before setting.
Step 5: Filling the Chocolate Shells
Now that the first layer of chocolate has hardened, it’s time to start layering our delicious fillings!
Instructions:
- Add the cheesecake layer – Spoon a layer of the cheesecake filling into each chocolate cup. Use the back of the spoon to smooth it out evenly.
- Top with strawberry sauce – Add a small spoonful of the cooled strawberry sauce on top of the cheesecake filling. Try not to overfill, as we still need room for the crust and final chocolate layer!
- Sprinkle the graham cracker crust – Take a small amount of the prepared graham cracker crust mixture and gently press it on top of the strawberry sauce layer. This will create the perfect crunchy base.
Pro Tip: For a neater look, freeze the filling for 10 minutes before adding the final chocolate layer. This makes it easier to seal everything in place.
Step 6: Sealing and Setting the Chocolate Shells
Now for the final step—sealing the treats with chocolate! This ensures all the layers stay perfectly contained inside that rich, smooth chocolate shell.
Instructions:
- Cover with melted chocolate – Spoon the remaining melted chocolate over each cup, making sure to completely seal the filling inside.
- Smooth the tops – Use a small spatula or the back of a spoon to smooth out the chocolate for a polished finish.
- Refrigerate until firm – Place the molds back into the fridge for at least 1 hour to allow everything to fully set.
- Gently remove from molds – Once firm, carefully pop the Strawberry Cheesecake Reese’s out of the silicone molds.
Pro Tip: If you want that extra professional shine, let the chocolates sit at room temperature for 5-10 minutes after removing from the fridge before serving.

Serving and Storing Your Strawberry Cheesecake Reese’s
Now that your treats are done, it’s time to enjoy them! Whether you serve them as a party dessert, a sweet snack, or a homemade gift, these indulgent chocolate cups are guaranteed to impress.
Serving Suggestions:
- Pair with fresh strawberries – Arrange them on a plate with a few fresh berries for a beautiful presentation.
- Drizzle with extra chocolate – Melt a little white chocolate and drizzle over the tops for an elegant finish.
- Enjoy chilled or slightly softened – If you love a firmer texture, keep them in the fridge; for a melt-in-your-mouth experience, let them sit out for a few minutes before biting in.
How to Store:
- Refrigerator – Store in an airtight container in the fridge for up to one week.
- Freezer – For longer storage, freeze them in an airtight container for up to one month. Just let them thaw for a few minutes before eating.
Pro Tip: Want to make these even fancier? Sprinkle crushed freeze-dried strawberries or graham cracker crumbs on top before the final chocolate layer sets!
Frequently Asked Questions (FAQs)
1. Can I use store-bought strawberry sauce instead of making my own?
Yes! If you’re short on time, you can use a store-bought strawberry sauce or even a good-quality strawberry jam. Just make sure it’s not too runny, or it may leak out of the chocolate shell.
2. What kind of chocolate is best for the shell?
Both milk chocolate and dark chocolate work great for this recipe. If you prefer a sweeter taste, go for milk chocolate. If you like a richer contrast, dark chocolate is a perfect choice. White chocolate is also an option if you want a unique twist!
3. Can I make these ahead of time?
Absolutely! These can be made a day or two ahead and stored in the fridge. They’re perfect for parties, gifting, or just having on hand for when a sweet craving strikes.
4. Can I use a different crust?
Yes! While graham crackers give that classic cheesecake taste, you can swap them for Oreos, vanilla wafers, or even shortbread cookies for a fun variation.
5. What if my chocolate shell cracks when I remove them from the mold?
This can happen if the chocolate is too thin or too cold. To prevent this:
- Double-coat the shell – Apply two layers of chocolate before adding the filling.
- Let them sit at room temperature for a few minutes before removing from the mold.
6. Can I make these without a silicone mold?
Yes! If you don’t have silicone molds, you can use lined muffin tins. Just make sure to line them with parchment cupcake liners so they pop out easily.
7. How can I make these even fancier?
If you want to take these to the next level, try:
- Drizzling white or dark chocolate over the tops for an elegant finish.
- Sprinkling crushed freeze-dried strawberries for a gourmet look.
- Adding a pinch of sea salt for that sweet-and-salty contrast.
Expert Tips for the Perfect Strawberry Cheesecake Reese’s
- Use high-quality chocolate – Since chocolate is a big part of this recipe, using good-quality chocolate (like Ghirardelli or Lindt) will make a difference in taste and texture.
- Chill in between layers – This prevents the layers from mixing together and gives you those beautiful, distinct layers when you bite into them.
- Don’t overfill with cheesecake or sauce – Leave a little space at the top so you can completely seal the chocolate shell without any leaking.
- Freeze for easier removal – If your treats are sticking to the molds, pop them in the freezer for 5 minutes before trying again.
- Make it mini! – Want a bite-sized version? Use mini silicone molds for adorable, poppable treats!
Conclusion: Your New Favorite Sweet Treat
And there you have it—Strawberry Cheesecake Reese’s, a homemade treat that’s creamy, chocolatey, fruity, and just downright irresistible.
Whether you’re making them for a special occasion, a fun weekend project, or just because you deserve something sweet, these little delights will impress everyone who takes a bite.
Now, I’d love to hear from you! If you try this recipe, let me know how they turned out in the comments. Did you make any fun variations? Did you go for milk chocolate, dark chocolate, or even white chocolate? I can’t wait to hear about your sweet creations!
Happy baking, and enjoy every bite of your homemade Strawberry Cheesecake Reese’s!
Print
STRAWBERRY CHEESECAKE REESES
- Total Time: 1 hour, 20 mins
Description
A delicious no-bake treat combining creamy cheesecake, fresh strawberry sauce, and a graham cracker crust inside a chocolate shell. Perfect for a sweet bite-sized dessert!
Ingredients
For the graham cracker crust
- 1 cup graham cracker crumbs
- 1/4 cup melted butter
- 2 tablespoons granulated sugar
For the cheesecake filling
- 8 ounces cream cheese (softened)
- 1/4 cup granulated sugar
- 1 teaspoon vanilla extract
- 1 tablespoon lemon juice (optional, for a slight tang)
For the strawberry sauce
- 1 cup fresh strawberries, hulled and chopped
- 2 tablespoons granulated sugar
- 1 teaspoon lemon juice
For the chocolate shell
- 2 cups melted chocolate (milk or dark)
Instructions
1️⃣ Prepare the graham cracker crust
Combine ingredients – In a small bowl, mix the graham cracker crumbs, melted butter, and granulated sugar.
Mix thoroughly – Stir until evenly coated and the texture resembles wet sand. Set aside.
2️⃣ Make the cheesecake filling
Beat the cream cheese – In a mixing bowl, beat the softened cream cheese until smooth.
Add sugar and flavorings – Mix in granulated sugar, vanilla extract, and lemon juice (if using). Beat until creamy and well combined.
3️⃣ Prepare the strawberry sauce
Cook the strawberries – In a small saucepan, combine chopped strawberries, sugar, and lemon juice. Cook over medium heat, stirring occasionally, until the mixture thickens into a sauce (about 5-7 minutes).
Cool the sauce – Remove from heat and let it cool completely.
4️⃣ Assemble the Chocolate Shells
Melt the chocolate – Using a microwave or double boiler, melt the chocolate until smooth.
Coat the molds – Pour melted chocolate into silicone cupcake molds or a Reese’s-style mold, spreading it evenly along the sides. Refrigerate for 10 minutes to set.
5️⃣ Fill and Finish
Layer the cheesecake – Spoon a layer of cheesecake filling into each chocolate shell, smoothing the top.
Add strawberry sauce – Top with a spoonful of cooled strawberry sauce.
Add crust layer – Sprinkle the graham cracker crust over the strawberry layer and gently press down.
Seal with chocolate – Pour a final layer of melted chocolate to cover the filling. Smooth it out.
6️⃣ Set and Serve
Refrigerate the cups for at least 1 hour until firm.
Gently remove from the molds and enjoy your Strawberry Cheesecake Reese’s!
Notes
- For extra crunch, mix crushed freeze-dried strawberries into the chocolate.
- Use dark chocolate for a richer taste.
- Store in an airtight container in the fridge for up to 5 days.
- Prep Time: 20 mins
- Cook Time: 1 hour
