

When it comes to crafting the perfect weeknight dinner, I’m all about recipes that strike the balance between flavorful, quick, and easy. Enter: Honey Garlic Chicken Breasts. This dish is everything you want in a meal—tender chicken, a glossy, sweet-and-savory sauce, and a hint of garlic that ties everything together. Whether you’re cooking for a family, prepping for a dinner party, or simply treating yourself, this recipe is bound to impress without breaking a sweat.
Why You’ll Love This Recipe
There’s just something magical about the combination of honey and garlic. The honey caramelizes beautifully in the pan, while the garlic adds depth, making each bite an explosion of flavor. The best part? It comes together in about 30 minutes—perfect for busy weeknights when time is of the essence but you still want something that feels indulgent.
Let’s Get Cooking: The First Steps
Ingredients You’ll Need
Here’s what you’ll need to whip up this delightful dish:
For the Chicken:
- 1 tablespoon olive oil
- 2 tablespoons butter (divided)
- 1 pound boneless, skinless chicken breasts
- 1/4 cup all-purpose flour
- Kosher salt and freshly cracked black pepper to taste
For the Sauce:
- 6 cloves garlic, thinly sliced
- 1/4 cup soy sauce
- 1 tablespoon seasoned rice vinegar
- 1/3 cup honey
- Kosher salt and freshly cracked black pepper to taste
For Garnish:
- Thinly sliced green onions for that extra pop of freshness.
Step 1: Prepare the Cooking Base
Start by heating 1 tablespoon of olive oil and 1 tablespoon of butter in a large frying pan over medium to medium-high heat. The butter adds richness, while the olive oil ensures a higher smoke point, so nothing burns. You want a shimmering, hot base that’s ready to sear the chicken.
Pro Tip: Make sure your pan isn’t overcrowded! Giving the chicken enough space ensures a golden, crispy crust instead of steaming the meat.
Step 2: Prep and Season the Chicken
Next, slice the chicken breasts in half lengthwise. This gives you four thinner pieces that cook faster and more evenly. Season both sides generously with kosher salt and freshly cracked black pepper—this is your foundation of flavor.
Then, dredge each piece in all-purpose flour, making sure to shake off any excess. The flour creates a light crust that helps the sauce stick later while adding a subtle crispness.
Why It Matters: Coating the chicken in flour not only enhances texture but also helps thicken the sauce later, creating that luscious, restaurant-quality glaze.
Step 3: Cook to Golden Perfection
Add the floured chicken to your hot pan. Cook for 4-5 minutes per side until golden brown and almost fully cooked. Resist the urge to flip too soon—you want a beautiful golden crust to form. Once done, transfer the chicken to a plate, but keep those juices in the pan—they’re pure flavor gold!
Why This Recipe Works
This Honey Garlic Chicken recipe is designed for maximum flavor with minimal effort. The use of pantry staples like soy sauce, honey, and garlic means you probably have everything you need on hand. Plus, the recipe is flexible—swap chicken breasts for thighs, add a dash of chili flakes for spice, or toss in some steamed veggies for a complete one-pan meal.
Step 4: Making the Sauce
With the chicken set aside, it’s time to work some magic in the same pan. This way, all those delicious browned bits left behind from cooking the chicken will infuse your sauce with even more flavor.
Melt and Sauté
Start by melting the remaining tablespoon of butter over medium-low heat. Add the thinly sliced garlic and sauté for about 30-60 seconds, stirring constantly. The goal here is to release the garlic’s natural sweetness without letting it brown, which can add bitterness.
Pro Tip: Keep an eye on the garlic! It cooks fast, and burnt garlic can overpower the sauce.
Deglaze and Build the Sauce
Once your kitchen is filled with that mouthwatering garlic aroma, it’s time to add the rest of the sauce ingredients:
- Soy Sauce: Pour in the soy sauce and let it sizzle as you scrape up any browned bits from the bottom of the pan. These bits are packed with flavor and will help create a deep, savory base for the sauce.
- Seasoned Rice Vinegar: Add a tablespoon of seasoned rice vinegar for a subtle tang that balances the sweetness.
- Honey: Stir in the honey, which will thicken as it heats, creating that glossy, sticky texture we’re aiming for.
Season the sauce with a few cracks of freshly ground black pepper and a pinch of kosher salt. Let the mixture simmer gently over medium-low heat for 4-5 minutes until it thickens slightly and coats the back of a spoon.
Pro Tip: If you prefer a spicier kick, this is the perfect time to add a pinch of red pepper flakes or a drizzle of sriracha.
Step 5: Combine and Warm
With your sauce ready, it’s time to bring the chicken back into the mix. Return the chicken breasts to the pan, along with any juices that have accumulated on the plate. The juices add extra flavor and ensure the chicken stays moist.
Simmer and Coat
Turn the chicken pieces in the sauce, making sure each piece is well coated. Let them simmer for 1-2 minutes in the sauce to absorb all that delicious flavor. This step also ensures the chicken is fully cooked through.
Step 6: Serve and Garnish
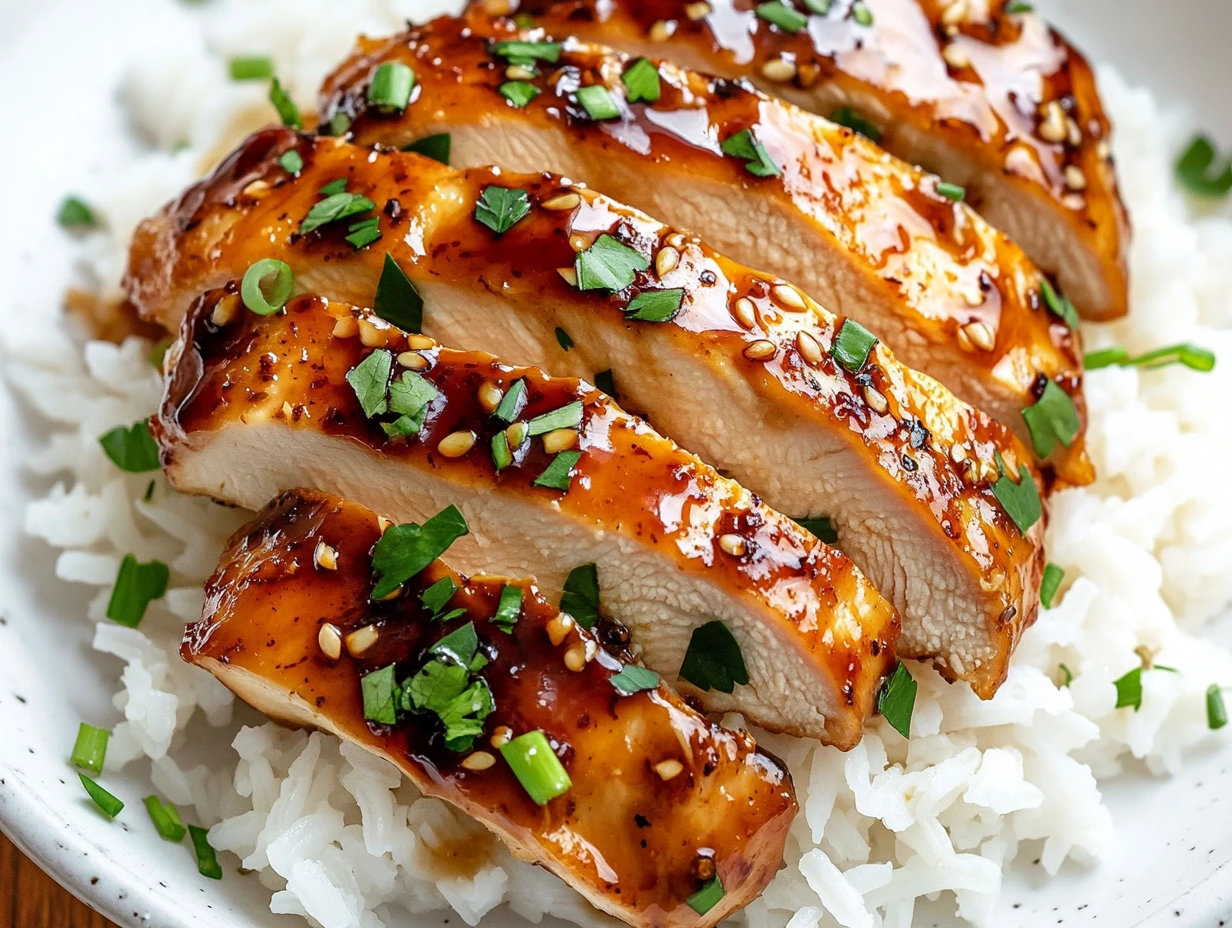
Now comes the best part—plating your masterpiece! Transfer the chicken to a serving dish and drizzle any remaining sauce from the pan over the top. For a fresh, vibrant finish, garnish with thinly sliced green onions. The subtle crunch and slight peppery flavor from the onions complement the sweetness of the sauce beautifully.
Serving Suggestions:
- Pair this dish with steamed jasmine rice to soak up all that extra sauce.
- Add a side of stir-fried or roasted vegetables, like broccoli, snap peas, or carrots, for a balanced, colorful plate.

Pro Tips for Success
1. Make It a Meal Prep Hero
This recipe holds up beautifully as leftovers. Store the chicken and sauce in an airtight container in the fridge for up to three days. Reheat gently in a pan over low heat to maintain the sauce’s silky texture.
2. Double the Sauce
If you’re a sauce lover (who isn’t?), consider doubling the sauce recipe. It’s fantastic drizzled over rice or even used as a dipping sauce for veggies.
3. Use Thighs Instead
Boneless, skinless chicken thighs work just as well as breasts in this recipe. They’re naturally juicier and even more forgiving if slightly overcooked.
FAQs: Your Questions Answered
1. Can I use bone-in chicken instead of boneless?
Absolutely! Bone-in chicken works well, though the cooking time will be longer. Sear the chicken as directed, then finish it in the oven at 375°F (190°C) until it reaches an internal temperature of 165°F (74°C).
2. Is there a way to make this recipe gluten-free?
Yes! Swap the all-purpose flour for a gluten-free alternative, like rice flour or a gluten-free flour blend. Ensure your soy sauce is labeled gluten-free (tamari is a great option).
3. Can I make the sauce spicier?
For those who love a kick, add a pinch of red pepper flakes, a dash of hot sauce, or a drizzle of sriracha when preparing the sauce. Adjust to your heat preference!
4. What’s the best way to store and reheat leftovers?
Store leftovers in an airtight container in the refrigerator for up to 3 days. To reheat, gently warm the chicken and sauce in a skillet over low heat, adding a splash of water or chicken broth if the sauce has thickened too much.
5. Can I freeze Honey Garlic Chicken?
Yes! Allow the chicken and sauce to cool completely, then transfer to a freezer-safe container. Freeze for up to 3 months. Thaw overnight in the fridge before reheating on the stovetop.
6. Can I use chicken thighs instead of breasts?
Definitely! Boneless, skinless chicken thighs are a fantastic alternative. They’re juicier and slightly more forgiving if overcooked, making them a great choice for this recipe.
7. What can I serve with this dish?
This chicken pairs beautifully with steamed jasmine rice, quinoa, or mashed potatoes. For veggies, try sautéed green beans, roasted broccoli, or a fresh side salad.
Wrapping It Up: Why You’ll Love This Recipe
Honey Garlic Chicken Breasts is more than just a meal—it’s a weeknight hero, a dinner party showstopper, and a dish that’s as satisfying to make as it is to eat. The balance of tender chicken with the sweet-savory sauce creates a flavor combination that feels like a little bit of luxury on your plate.
Whether you’re making it for the first time or it’s already part of your regular rotation, this recipe is one you’ll keep coming back to. It’s versatile, quick, and packed with flavors that’ll have everyone at the table asking for seconds (or thirds!).
Final Encouragement
If you give this recipe a try, I’d love to hear how it turned out! Did you tweak the sauce, pair it with something creative, or add your own spin? Drop a comment below and share your experience. And if you’re looking for more inspiration, bookmark this page—you’ll want to make this dish again and again.
Now grab your apron and get cooking. Trust me, one bite of this Honey Garlic Chicken, and it’ll become a favorite in your recipe collection!
Print
Honey Garlic Chicken Breasts
- Total Time: 30 mins
Description
Sweet and savory, this honey garlic chicken recipe is a perfect balance of flavors. Tender chicken breasts are coated in a golden, garlicky sauce with hints of soy and honey, making it an easy yet elegant dish for weeknight dinners or special occasions. Serve it with steamed rice or sautéed veggies for a complete meal.
Ingredients
For the Chicken:
- 1 tablespoon olive oil
- 2 tablespoons butter (divided)
- 1 pound boneless, skinless chicken breasts
- 1/4 cup all-purpose flour
- Kosher salt to taste
- Freshly cracked black pepper to taste
For the Sauce:
- 6 cloves garlic, thinly sliced
- 1/4 cup soy sauce
- 1 tablespoon seasoned rice vinegar
- 1/3 cup honey
- Freshly cracked black pepper to taste
- Kosher salt to taste
For Garnish:
- Green onions, thinly sliced
Instructions
1️⃣ Prepare the Cooking Base:
Heat 1 tablespoon olive oil and 1 tablespoon butter in a large frying pan over medium to medium-high heat.
2️⃣ Prepare the Chicken:
Slice the chicken breasts in half lengthwise to create four thinner pieces. Season both sides of each piece with kosher salt and freshly cracked black pepper. Dredge the chicken in all-purpose flour, coating evenly.
3️⃣ Cook the Chicken:
Add the floured chicken to the heated pan. Cook for 4-5 minutes per side, until golden brown and nearly fully cooked. Remove the chicken from the pan and set aside, reserving any juices left in the pan.
4️⃣ Make the Sauce:
In the same pan, melt the remaining tablespoon of butter over medium-low heat. Add the sliced garlic and stir constantly for 30-60 seconds until fragrant but not browned.
5️⃣ Deglaze and Finish the Sauce:
Pour in the soy sauce and seasoned rice vinegar, scraping up any browned bits from the pan for added flavor. Stir in the honey, followed by a few cracks of black pepper and a pinch of salt. Simmer the sauce over medium-low heat for 4-5 minutes until it thickens slightly and coats the back of a spoon.
6️⃣ Combine and Warm:
Return the chicken to the pan along with any reserved juices. Let the chicken simmer in the sauce for about 1-2 minutes, ensuring it is fully warmed through and well coated.
7️⃣ Serve:
Plate the chicken and drizzle any extra sauce from the pan on top. Garnish with thinly sliced green onions for freshness and a pop of color.
Notes
- For a spicier kick, add a pinch of red pepper flakes to the sauce.
- If you prefer a thicker sauce, let it simmer an additional 1-2 minutes or stir in a small slurry of cornstarch and water.
- This dish pairs wonderfully with jasmine rice, roasted potatoes, or steamed broccoli.
- Prep Time: 10 mins
- Cook Time: 20 mins
