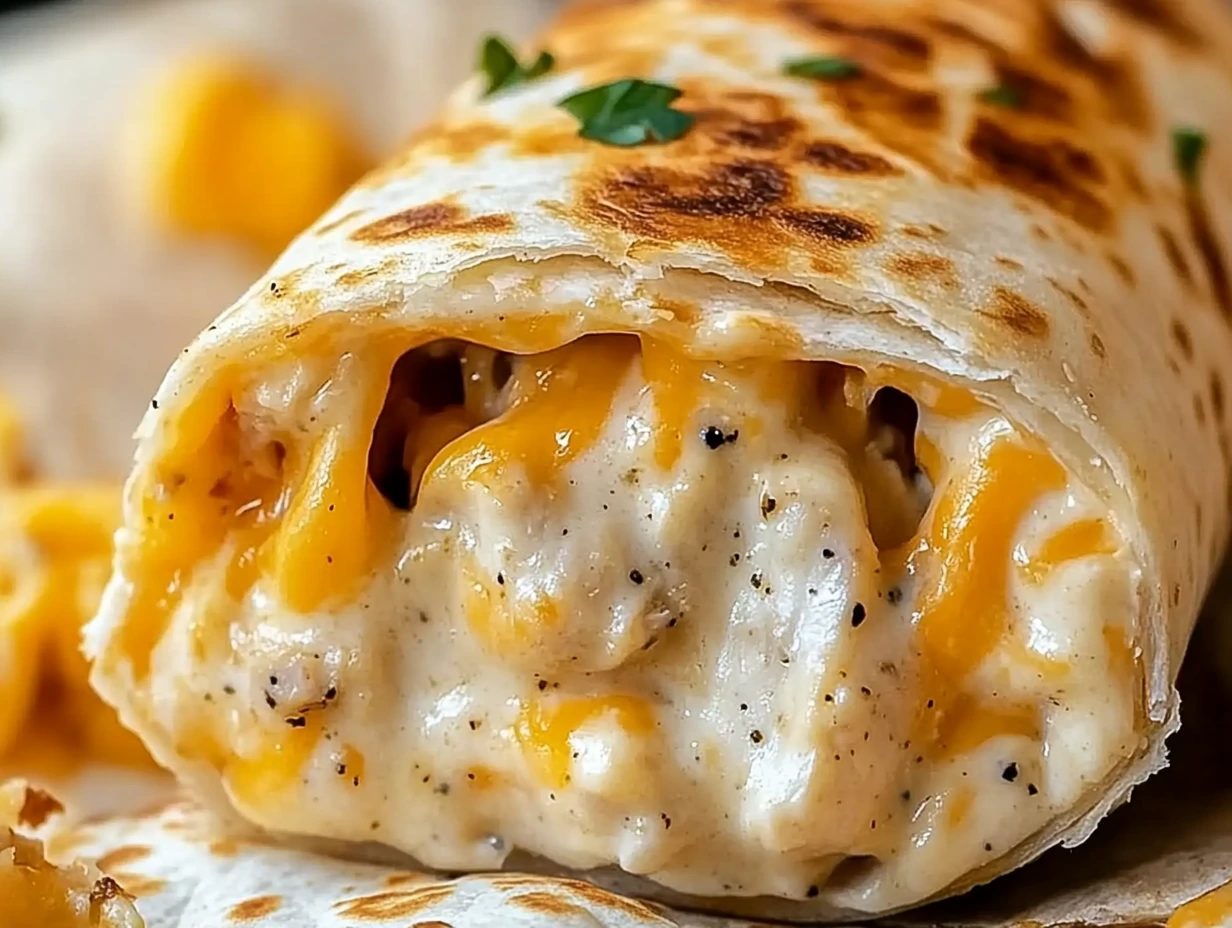

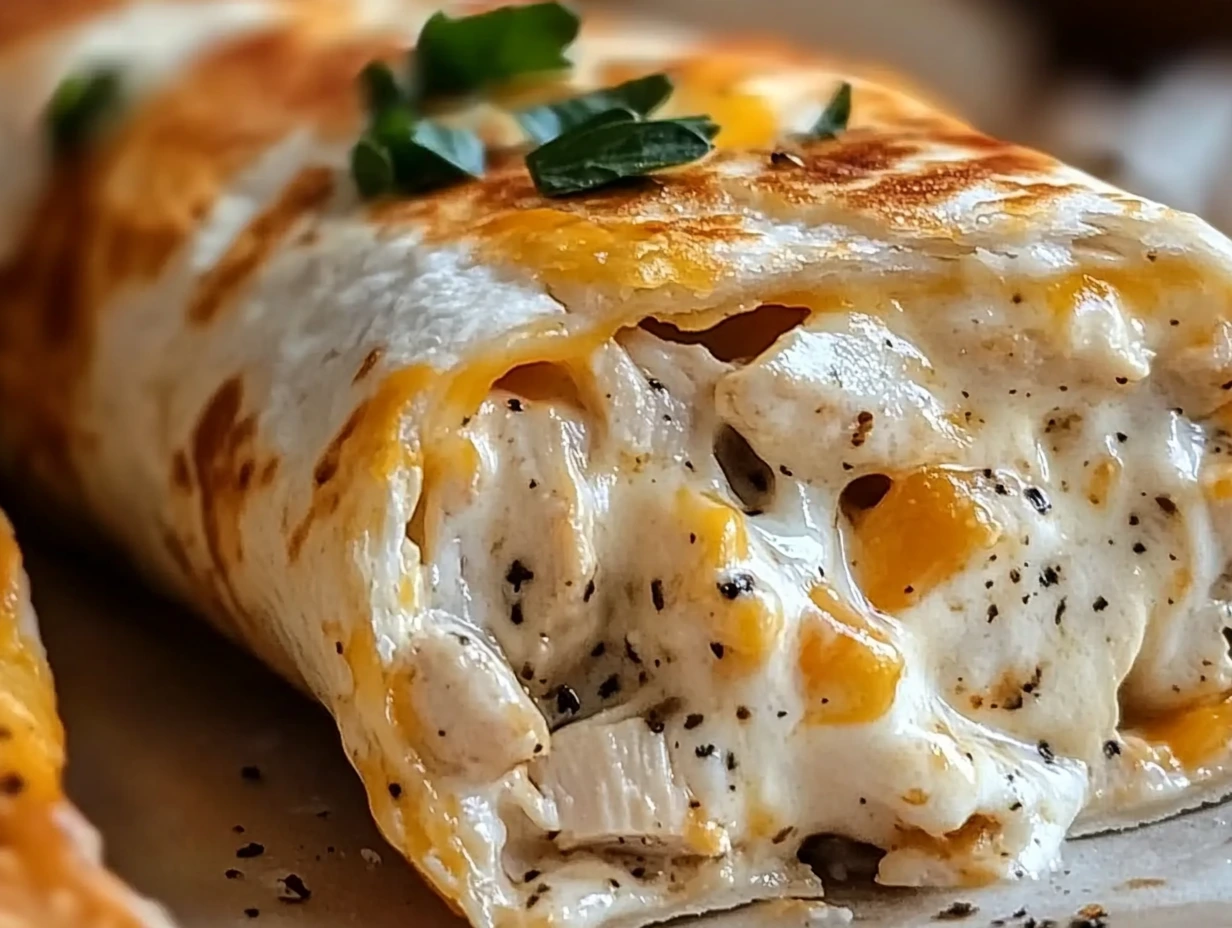
If you’re looking for a meal that’s packed with flavor, easy to prepare, and incredibly satisfying, then these Cheesy Garlic Chicken Wraps are exactly what you need. The combination of creamy cheese, seasoned chicken, and a touch of garlic makes for a wrap that’s irresistible. Whether you’re using up leftover rotisserie chicken or grilling some fresh chicken breasts, this recipe is both versatile and delicious.
I’ve always been a fan of wraps because they’re so easy to customize. You can go as simple or as complex as you want with the fillings, but this cheesy garlic chicken version is one of my absolute favorites. The cream cheese and sour cream blend into a rich, tangy base that pairs perfectly with the savory chicken and gooey cheese. Plus, it’s an all-in-one meal that’s quick enough to prepare for a weeknight dinner, yet special enough to serve at a weekend get-together.
Let’s dive into this recipe and get you started with the first steps to making these Cheesy Garlic Chicken Wraps!
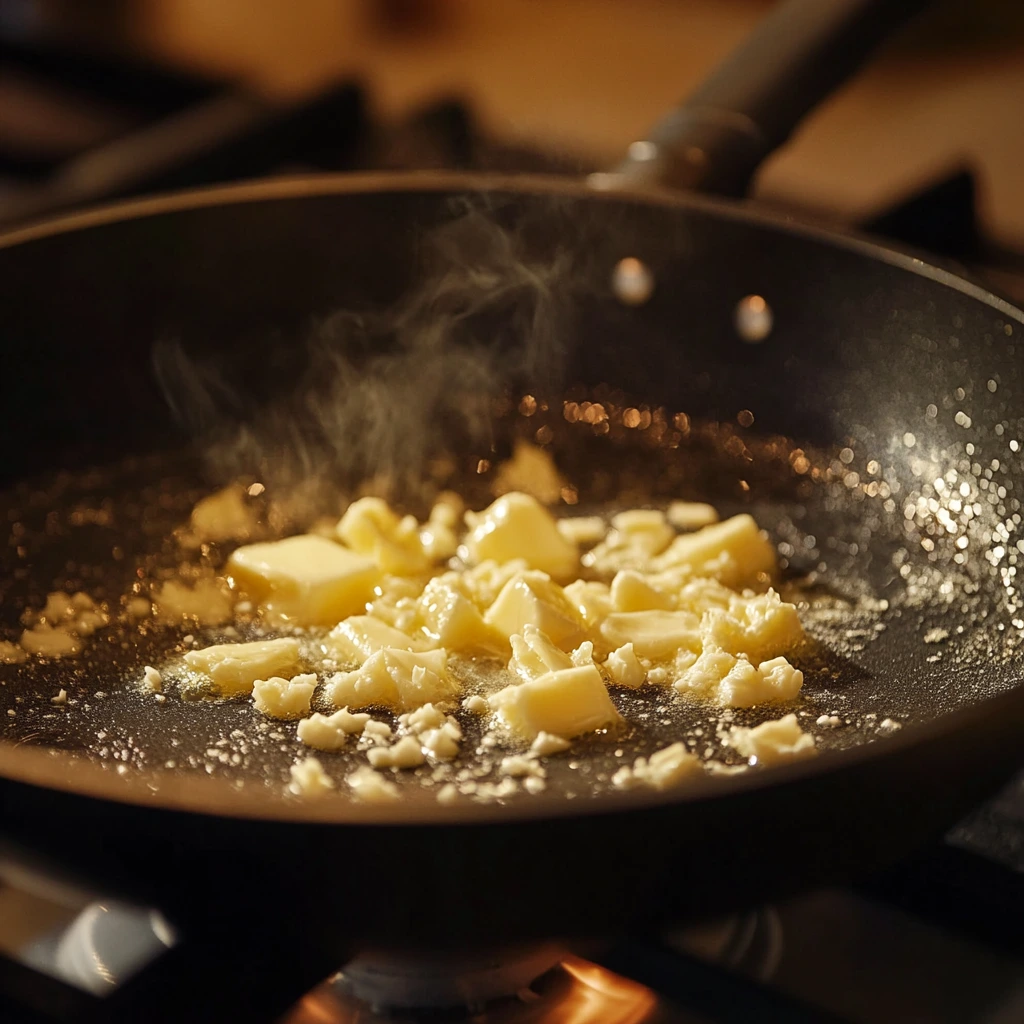
Step 1: Sauté the Garlic
The key to unlocking that delicious garlic flavor is sautéing it properly. Start by melting a little butter in a skillet over medium heat. Once the butter is melted, add the minced garlic and let it cook for about 1-2 minutes. You want to sauté it just until it becomes fragrant—be sure to stir it often so that it doesn’t burn. Garlic can turn bitter really quickly if overcooked, so keep an eye on it! When you smell that warm, savory aroma, you know it’s time to move to the next step.
Step 2: Season and Heat the Chicken
Now, let’s bring the chicken into the mix. If you’re using rotisserie chicken, this is the perfect opportunity to give it a quick reheat and infuse it with those delicious garlic flavors. Add your shredded chicken to the skillet with the garlic. This could also be a great time to use up any leftover chicken you might have from a previous meal. Once the chicken is in the skillet, sprinkle it generously with garlic powder, Italian seasoning, and a pinch of salt and pepper. Give it a good stir, ensuring the chicken is well-coated with the seasonings. Let everything heat through for a couple of minutes, so the flavors meld together and your kitchen starts to smell amazing!
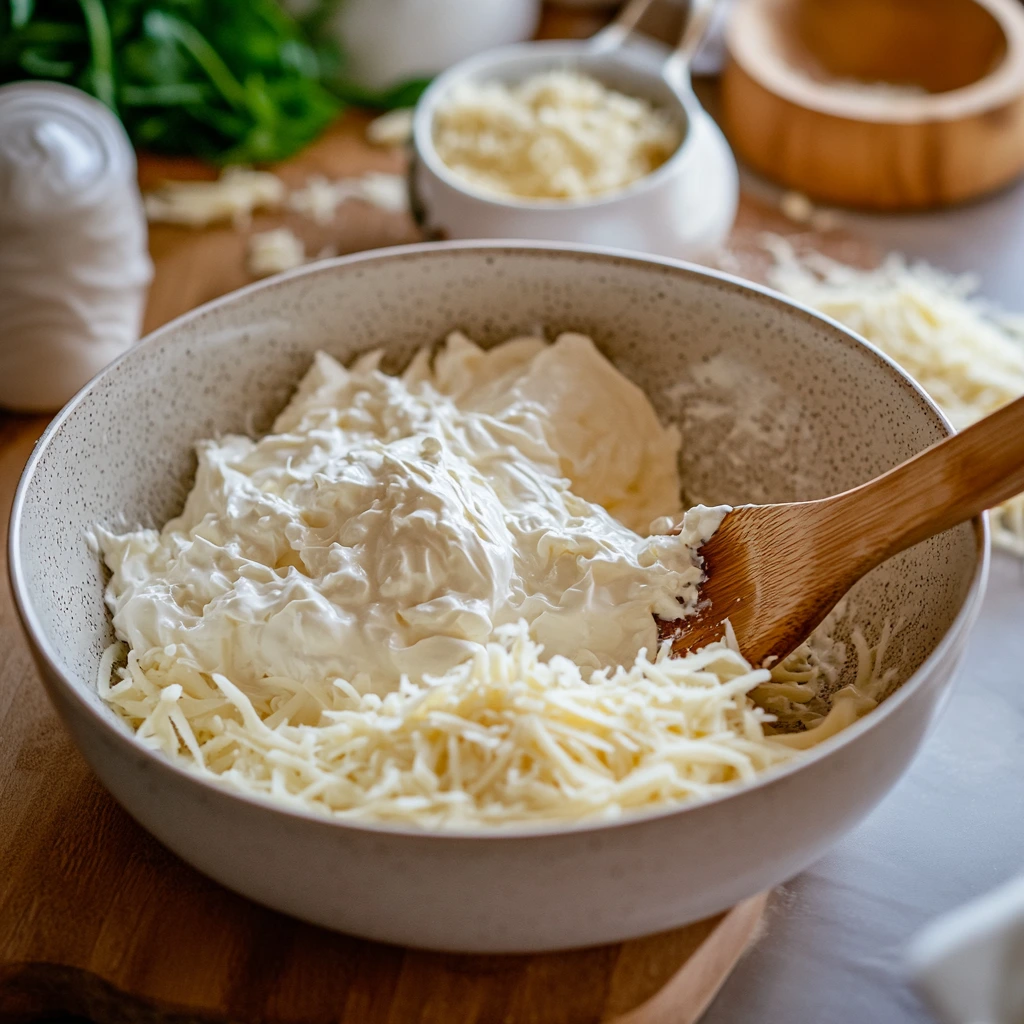
Step 3: Prepare the Cheese Mixture
Now for the creamy goodness that will make these wraps extra special: the cheese mixture. In a bowl, combine softened cream cheese and sour cream. The cream cheese will give the mixture that rich, velvety texture, while the sour cream adds a tangy bite that cuts through the richness. Stir in half of the shredded mozzarella or cheddar cheese, whichever you prefer. Mozzarella will give you a mild, creamy flavor, while cheddar adds a sharper kick. Once everything is mixed together into a smooth, creamy base, you’ll have the perfect filling to bind everything together.
Step 4: Combine the Chicken and Cheese
Once your chicken is seasoned and heated through, it’s time to bring it together with the creamy cheese mixture. Take the skillet off the heat and carefully fold the seasoned chicken into the cheese mixture. This step is where all the magic happens—mixing the creamy cheese with the savory chicken creates the perfect filling for your wraps. Stir everything together gently but thoroughly so that each piece of chicken gets coated with that cheesy goodness. The heat from the chicken will help the cheese melt, making the filling extra smooth and creamy.
It’s important to make sure the mixture is well-combined before moving on to the next step. You want each bite of the wrap to have that delicious balance of cheesy, garlicky chicken, so don’t rush through this part!
Step 5: Assemble the Wraps
Now, grab your tortillas! Large flour tortillas work best for this recipe since they’ll be able to hold all the filling and be rolled tightly. Lay them out flat on a clean surface, like a cutting board or countertop. Spoon an even amount of the chicken and cheese mixture into the center of each tortilla. You don’t want to overstuff them, as that can make rolling a bit tricky. A generous scoop in the middle will do the trick.
Once you’ve added the filling, sprinkle the remaining shredded cheese on top. This extra layer of cheese will melt as the wraps cook, adding that irresistible gooey texture. Next, fold in the sides of the tortilla and then roll it up tightly, making sure the filling stays secure inside.
It’s helpful to fold the sides of the tortilla first before rolling to ensure everything stays neat and doesn’t spill out. You’ll want to make sure the wrap is snug but not too tight, as this could cause it to tear when you cook it.
Step 6: Cook the Wraps
Now for the fun part—getting these wraps nice and crispy! Heat a clean skillet over medium heat. You don’t need to add any oil or butter to the skillet unless you want an extra crispy finish. If you like a buttery, golden exterior, feel free to brush the outside of the tortillas with some melted butter before placing them in the skillet. This will give them an irresistible crunch and a rich flavor.
Place the wraps seam-side down in the skillet. Let them cook for 2-3 minutes on the first side until golden brown and crispy. Then, flip them over and cook for another 2-3 minutes on the other side. Keep an eye on them to avoid burning, and adjust the heat if necessary. The goal is to get that golden color and crispy texture, while allowing the cheese inside to melt beautifully. When both sides are perfectly crispy and golden, you’re done!